
Uncategorized
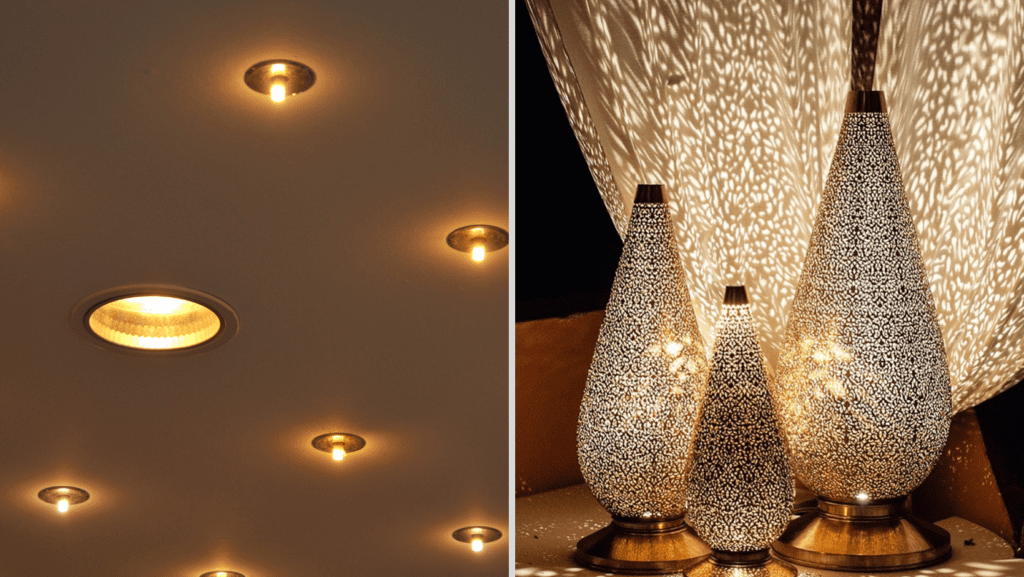
How to Install LED Recessed Lighting in Existing Ceiling
Aug

Modern Dining Room Light Fixtures
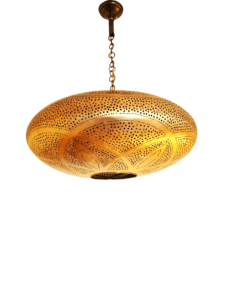
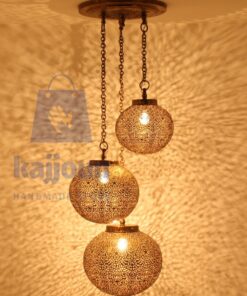
Moroccan Pendant Light | Handmade Brass Lamp | Modern Pendant Lighting for Indoor & Outdoor Spaces
Bedroom Light Fixtures


Bedroom Light Fixtures

Modern Dining Room Light Fixtures
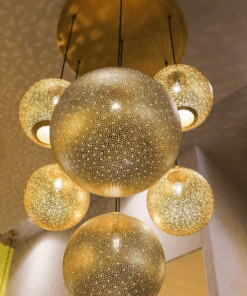
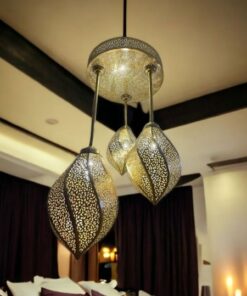
Openwork Copper Gold Chandelier – 6 Elements, Modern Art Deco Lighting Fixture

Bedroom Light Fixtures
Bedroom Light Fixtures

Bedroom Light Fixtures
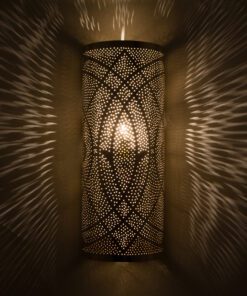
Moroccan Pendant Lighting Set: Elegant Lamp Shades for Hanging Lights with Ceiling Plate
Bedroom Light Fixtures
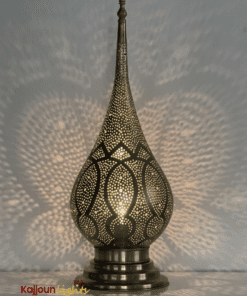

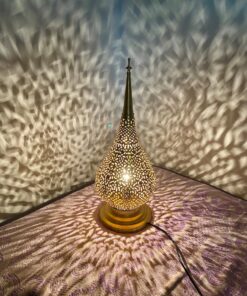
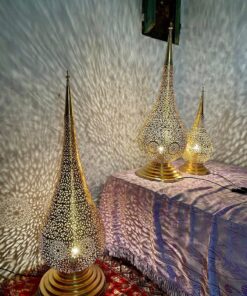
Moroccan Floor Lamp

Modern Dining Room Light Fixtures


Bedroom Light Fixtures

Modern Dining Room Light Fixtures
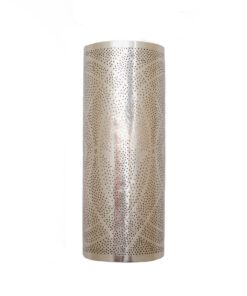
SET OF 2 Brass kitchen pendant lighting – Brass modern kitchen lighting
How to Install LED Recessed Lighting in Existing Ceiling
Installing LED recessed lighting in an existing ceiling can significantly enhance the ambiance of a room while providing energy-efficient illumination. The first step in this process is selecting the right LED recessed lights based on the desired brightness and beam angle. It is essential to measure the ceiling height and room dimensions to determine the appropriate number and placement of lights.
Once you have your materials, the installation process begins by marking the locations where the lights will be installed. Carefully cut the holes in the ceiling, ensuring they are appropriately sized for the recessed lighting fixtures. Wiring the lights requires some electrical knowledge, so if you are not confident, it is advisable to consult with a professional electrician. Finally, after wiring, secure the LED recessed lights in the ceiling and test them to ensure they function correctly.
How to Install Recessed Lighting in Existing Light Fixture
Transforming an existing light fixture into a recessed lighting setup can be a straightforward yet effective way to modernize your space. This process begins with turning off the power to the light fixture at the breaker box to ensure safety. Next, remove the existing light fixture, exposing the wiring and junction box.
To adapt the existing fixture for recessed lighting, an adapter or retrofit kit may be required. These kits typically come with all the necessary hardware and instructions for installation. Attach the new recessed light to the junction box, connect the wiring, and secure the fixture in place. Once installed, the new recessed light should be tested to ensure it is functioning correctly. This method is ideal for those looking to upgrade without extensive ceiling modifications.
How to Install Recessed Lighting with Junction Box
Installing recessed lighting with a junction box is crucial for ensuring the safety and reliability of the electrical connection. The junction box serves as the central hub where all wiring connections are made, protecting the wires from damage and reducing the risk of electrical fires.
Begin the installation by selecting a location for the junction box that is easily accessible and close to the desired location of the recessed lights. Cut an opening in the ceiling for the junction box and secure it in place. Run electrical cables from the power source to the junction box and then from the junction box to each recessed light location.
Once the wiring is complete, connect the wires from the recessed lights to the corresponding wires in the junction box. Ensure all connections are secure and insulated. After installing the recessed lights in the ceiling, test the system to confirm that all lights are functioning correctly.
Recessed Lighting Calculator
A recessed lighting calculator is an invaluable tool for planning the layout of recessed lighting in a room. This calculator helps determine the optimal number of lights, their placement, and spacing to achieve the desired level of illumination.
To use a recessed lighting calculator, you need to input the room’s dimensions, ceiling height, and the type of lighting you intend to use. The calculator will provide recommendations for light placement, ensuring even distribution of light throughout the space. This tool is particularly useful for avoiding common issues such as shadows, glare, and inadequate lighting.
How to Install LED Recessed Lighting in New Construction
Installing LED recessed lighting in new construction offers the advantage of working with an open ceiling, allowing for greater flexibility in light placement and wiring. Start by planning the lighting layout based on the room’s function and desired ambiance. Mark the locations for each recessed light on the ceiling joists.
Before running the wiring, ensure that the power is turned off at the breaker box. Drill holes in the joists for the electrical cables and run the wires to each light location. Install the recessed light housings by securing them to the ceiling joists. These housings provide the structural support needed to hold the lights in place.
Once the wiring is complete, connect the wires to the light fixtures according to the manufacturer’s instructions. Install the LED recessed lights in the housings and test the system to ensure all lights function properly. This method ensures a clean, professional installation with minimal ceiling modifications.
Recessed Light Installation Cost
The cost of installing recessed lighting can vary significantly based on several factors, including the number of lights, type of lights, labor costs, and whether the installation is in an existing ceiling or new construction. On average, homeowners can expect to pay between $100 to $300 per light for professional installation.
DIY installation can reduce costs but requires a good understanding of electrical systems and building codes. Additional costs may include permits, if required, and any necessary repairs to the ceiling after installation. It is essential to budget for these expenses to avoid any surprises during the project.
Can You Install Recessed Lighting Yourself?
Installing recessed lighting yourself is possible, but it requires a moderate level of DIY skills, particularly in electrical work. The process involves cutting holes in the ceiling, running electrical wires, and connecting the lights to the power source. It is crucial to have a basic understanding of electrical safety and to follow all local building codes.
Before starting, gather all necessary tools and materials, and ensure you have a clear plan for the installation. Turn off the power at the breaker box to avoid electrical shock. If you are unsure about any aspect of the installation, consider consulting with a professional electrician to ensure a safe and successful project.
How to Install Halo Recessed Lighting
Halo recessed lighting is a popular choice for its versatility and ease of installation. Begin by selecting the appropriate Halo recessed light model for your needs, considering factors such as light output, color temperature, and trim style.
After turning off the power at the breaker box, mark the locations for the lights on the ceiling. Cut holes for the fixtures using a hole saw or drywall saw, and ensure they are appropriately sized for the Halo lights. Run electrical cables to each light location, either from a junction box or an existing light fixture.
Install the Halo light housings in the ceiling, securing them with the provided brackets or clips. Connect the wires to the light fixtures according to the manufacturer’s instructions. Once all connections are secure, install the trim and light bulb, and restore power to test the installation. Halo recessed lighting offers a sleek, modern look that can enhance any room.